One of my favorite pastimes is scouring local thrift stores for hidden treasures. There's something thrilling about finding an item with potential, even if it's seen better days, and even if you don't know exactly what you will do with it.
Sometimes.... a vision comes to you AFTER you begin the work. If you find yourself feeling the call to create.... yet you feel stuck with your vision... just start! Which is exactly what happened with this Santa belly globe!

If you are a new reader, hello and welcome to the Fancy Fam! With over a decade of furniture painting experience, I can honestly say that sharing my projects through this blog is still my favorite way to inspire! I've got years worth of fun and creative ways to update your home decor and furniture through paint! If this sounds like something you'd like to have delivered to you every Sunday be sure to sign up for my weekly newsletter here!
The Vision
Recently, during one of my regular thrift shop hunts, I stumbled across a damaged world globe. This is my third globe to bring home with me as I am drawn to their nostalgia.
See my Christmas Wonderland Globe - another vintage globe turned winter wonderland.
This one was slightly damaged but had the most beautiful wood brass stand with a mid-century-modern flair. I had no specific plans for it but I was happy to add it to my inventory!
As the Christmas season approached, I couldn't stop thinking about the globe on my shelf. I wanted to paint it in holiday flair... and had considered adding poinsettias or greenery transfers to it.
So, I moved it from the shelf to my work table and began the process of painting it in my classic black and white checks that we all love.
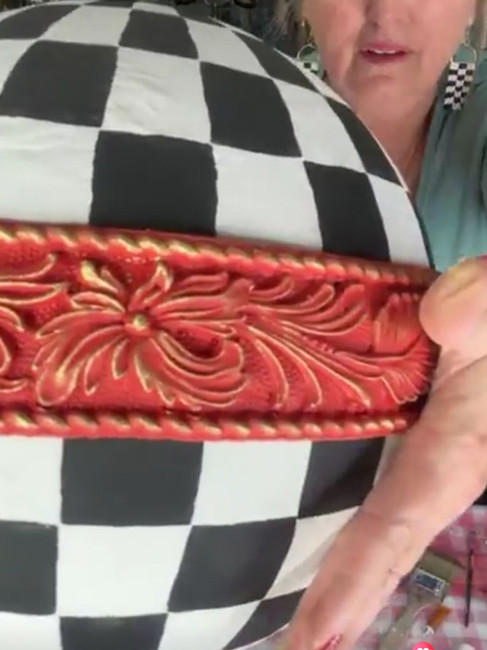
The Santa Belly vision came to me simply by holding the frame up to the globe!

I was considering adding frames around the globe to hold family photos or even tiny images of Christmas. However, as soon as I held the frame up to the globe......I realized it looked like a buckle......SANTA'S buckle!!! And that was it!
Supplies Used
Frame Mold
You can also shop my favorite products and tools in my Amazon influencer list here.
This post may contain affiliate links. I could make a commission at no charge to you if you purchase my recommended products. Please read my disclosure here and my privacy policy here.
The Process: Upcycled Holiday Santa Globe
1. Prep and Repair
The globe needed a little TLC before I could dive into painting. I cleaned off years of human touch using White Lighting spray and microfiber rag and rinsed with a final spray of water.
I also used small dots of hot glue to glue back down a few areas where the paper had lifted. Don't overlook the prep work...its the foundation of a successful makeover.
2. Marking and Painting
I used a sharpie marker to trace the longitudinal and latitudinal lines of the globe......which would be my mapping of the black and white checks.
I then painted a single coat of Fluff white over the entire globe. When the paint dries you can still see the sharpie lines.

Use those lines to trace again... and then fill in every other square with Caviar black.

3. Creating the Belt
Santa's belt was the centerpiece of this design. For the "leather" look, I used a specialty wood trim cut to size...making sure to leave space for the buckle (frame). I painted it with Honky Tonk Red (which I've always referred to as Santa Red).
Once dry, I used Tite Bond glue to glue the "belt" into place around the globe. I did have to call in an extra set of hands for this part of the process.

I struggled to keep the belt from slipping as this wood trim is quite chunky. But with a little bit of persistence and determination....we got it into place!
4. The Buckle
The buckle is actually a frame made from a mold and a pliable product called Form Flex.
You can make your molds ahead of time and keep them for future projects like I did here.
I painted the buckle gold using Gold Gilding Wax and went through multiple glues to get it to hold. I have been advised to use Gorilla Glue Sticks for future use with these molds.

I allowed the belt and buckle to dry overnight.
5. Finishing Touches
I wanted to add a frosty snowy feel to the globe and what better product to use than Diamond Dust Glitter Blast! I sprayed the entire globe and belt with this product. Once dry I sealed the glittery finish with the Glitter Blast Spray Sealer.

Once this was dry, I dry brushed gold gilding wax over the belt to accentuate the leather look carvings.
I also added a bit of gold gilding wax to freshen up the old brass arm and feet of the stand. And for the final finish.....I brushed on Clear Coat Gloss for a final extra high shine!

The Finished Look: Santa Belly Globe Holiday Statement Piece
The Santa Belly Globe is now a one of a kind holiday statement piece. It's a reminder that even the most damaged thrift store finds and become treasures with a little imagination, some bold patterns and lots of love!

The project brought me joy and inspired me to look at everyday objects with fresh eyes.

If this project inspired you, I'd love to see your take on a holiday makeover! Maybe you'll paint a globe, transform an old lamp or breathe new life into another thrift store find.
Let me know in the comments what treasures you've found and transformed this season!
More Inspiration: Christmas Furniture and Decor
Christmas projects are so fun to make and I have so many to share! I hope you can use them to draw inspiration for your upcoming project.
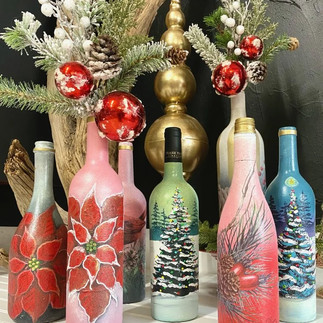
Holiday Themed Wine Bottles - an quick and easy hostess gift with a big impact
Whimsical Christmas Decorations - learn how to make your own whimsy tree
Christmas Gumball Machine - elf gumball machine for more holiday cheer
Tiny Whimsical Table - with holiday holograph table top
Santa Desk - a red beauty for Santa himself
Whimsy Nutcracker - Glow-Up ideas for a generic store-bought nutcracker
Click on any photo below for more up-close photos and all the design details
Also, be sure to check out my Christmas Wonderland Globe - another vintage globe turned winter wonderland.

JOIN ME FOR MORE...with Curiously Creative
If you enjoyed this and want more of a deep dive into home decor and DIY processes, I would love it if you joined my exclusive online creative group, Curiously Creative. I show up LIVE to guide you through every step of updating, upcycling, crafting, and creating on-trend home decor and gift-giving ideas!
Want more fancy furniture & design?
Save & Share on Pinterest!
Please please please share my Santa Belly Globe project and follow me on Pinterest!


