Heavenly Angelic Bed
- Tracey Bellion
- Aug 7, 2022
- 3 min read
Updated: Sep 14, 2023

What do you think of this Heavenly Angelic bed? Isn't it gorgeous??
As a furniture painter, I am offered many cast-offs and unwanted pieces by local friends and family.
I often accept these pieces to use as examples on social media or to teach my monthly classes in my private membership group.
That is exactly how I acquired this gorgeous antique headboard; however, it wasn't so gorgeous when I got it!

Come fly with me in this week's YouTube video!
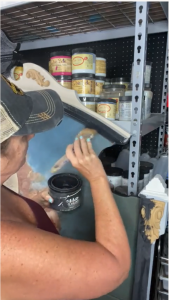
The artwork on the center-most of this Heavenly Angelic Bed is decoupage paper!

I taught the ladies in my class how to incorporate decoupage paper INTO your paint design, making it appear hand-painted with no visible edges to the paper showing!
This is done by using a heavy-bodied paint and a paint additive for texture, applied with a stippling and paint blending technique; thus, bringing the paint INTO the decoupage paper design.
The step-by-step decoupage/paint process is reserved for those in my group, but I will share all products and colors used below.
I REALLY want to share the surrounding bed frame process with YOU!
The original white paint of the bed was fully intact but was done poorly with drips and a high gloss shine. I chose to add age and texture to disguise what was there instead of sanding off the mess for a smooth surface.

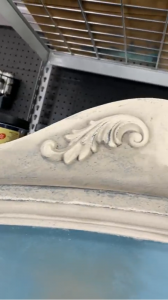
Before I began layering the Terra Clay paint, I applied two pairs of WoodUBend moldings to add visual interest.
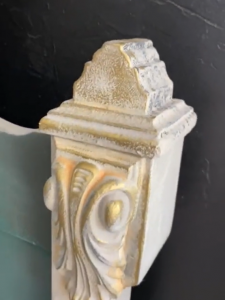
The miniature corbels added to the right and left posts were the perfect fit. And the swirly scrolls were a nice touch to the somewhat boring arches.
You can watch the full WoodUBend application process on my YouTube video.
Basically, you heat/glue/press/heat again/press again/paint.
I covered what I'm going to call "the frame" (the top arch and right/left post) in a single coat of Onyx (black), applied it with a stippling motion, and let it dry overnight.
The next morning, I top coated the black with Dixie Belle Top Coat Flat and let it dry (about an hour). This locks in my black paint and won't allow it to reactivate when I use water with the next layer.
I followed this with a single stippled coat of Desert Tan and let dry.
Our Heavenly Angelic Bed is coming along!
Using baby wipes, I wet distressed all edges and molds to reveal the underlayer of black. Wet distressing with clay paint is SO easy! A simple swipe and the upper layer disappears to reveal what is beneath. This is what makes this paint an "aged paint look" dream! You can continue to lock in layers, build layers, and expose layers!
Once dry, I was ready to add the third layer of paint, using a dry-brush technique. I chose Prairie Dawn terra paint, a soft white, and a premium chip brush to lightly dust a white hue over the texture of the dried layers. The light dry brushing caught all the peaks giving a highlight to the layers, and making the finish just come alive!

I was sooooo thrilled with the finish that I thought I was done. But...
I just kept hearing the ladies in my group saying "Add gold!" And I had not added gold.
You never really have to say "add gold" more than once to me It is my favorite color after all!
So using Gold Gilding wax and my finger, I lightly applied the finishing touches to our Heavenly Angelic Bed!
They were right!
GOLD is what married the decoupage paper art to the newly finished frame of the bed!

A huge thank you to my friend Olivia for gifting me this bed! I enjoyed every step of its recreation!!!!


